The Feature Properties dialog is formed of a two-column display, showing available properties in the left-hand column and the current value for the properties in the right hand column. The properties are grouped according to primitive type.
To modify a property, it is important to select the property from the right hand column, not the left-hand column. When a property is modified, the main MapLink Pro display is updated instantly to give feedback about your changes. You may use the Undo facility on the Feature Book to stop your change being permanent.
Simple Style Selection
Some properties, such as Fill, Line and Edge styles are selected via a 'combo' box. This combo box displays a sample rendering of each style. To change these properties, just click in the appropriate box, and choose the required style from the menu. Other similar properties, such as Text Horizontal Alignment display descriptions in the 'combo' box rather than sample renderings. The menu also allows you to choose 'None' or 'As Parent'.
Colour Selection
Colours are chosen through a separate Colour Palette dialog. The exact dialog displayed is dependent upon the Colour Palette that has been loaded. See Colour Palettes.
By default, the Colour Palette pops up when the property is selected and disappears once a colour has been chosen or the mouse is clicked outside of the dialog. The Colour Palette dialog may be 'pinned' in place so that it stays open. This allows you to place the dialog in a convenient place. When pinned, it will be updated to display the current value for the selected property. Separate buttons allow you to choose 'None' or 'As Parent'
Numeric Value Entry
Some properties, such as Edge Thickness and Text Size Factor require entry of a numeric value. Simply click in the right hand column of the appropriate property and type in a value. In addition to entering a value, some properties allow 'As Parent' to be chosen from a small list which may appear. Enter the value 0 for 'None'.
Dimension Unit Selection
Some properties allow you to choose how other properties are interpreted by the MapLink Pro display engine. For example, you may enter a value of 7 for Edge Thickness, and then choose how this is interpreted using the 'Thickness Units' property. This typically gives a choice of pixels, points or map units but may be expanded in a future release of MapLink Pro. The menu also allows you to choose 'None' or 'As Parent'.
Symbol Selection
Symbols are chosen through a separate Symbol Palette dialog.
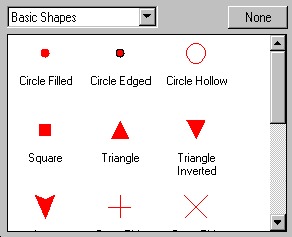
Symbols are organised into various categories. The combo box allows you to choose the category that is being displayed in the list box at the bottom of the dialog. Separate buttons allow you to choose 'None' or 'As Parent'
Copyright © 1998 to by Envitia Group PLC.