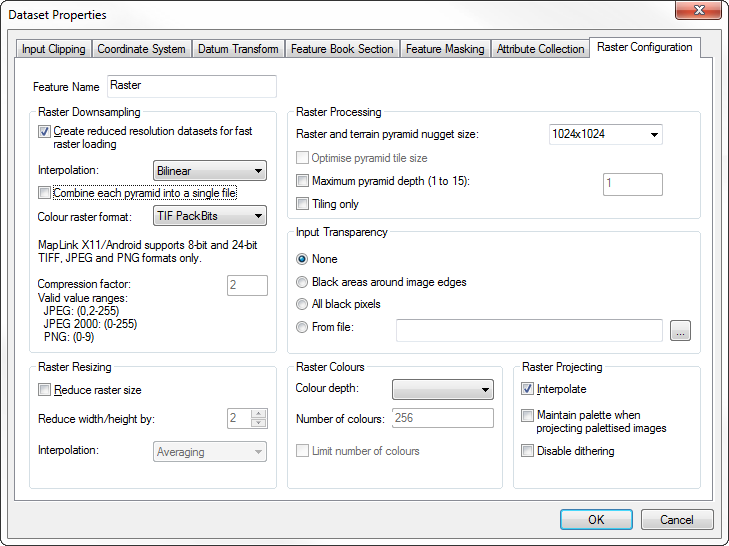
Feature Name for Raster
The ‘Feature Name’ box allows the user to enter a feature name for the Raster. That name may be used at run-time to hide the Raster using the normal decluttering facilities in the MapLink SDK. If none is specified, then the feature name defaults to 'Raster'
Raster Downsampling
Create reduced resolution datasets for fast raster loading.
Often, using raster data involves using a large amount of memory to display the image. Creating reduced resolution datasets is a mechanism designed to limit the amount of data held in memory at one time, while still maintaining the resolution of the original image. If this is enabled, MapLink Pro will create a pyramid of raster layers, breaking the raster down into a multi-layered, tiled pyramid. Note that it is not possible to apply Raster Downsampling and Raster Resizing to the same image.
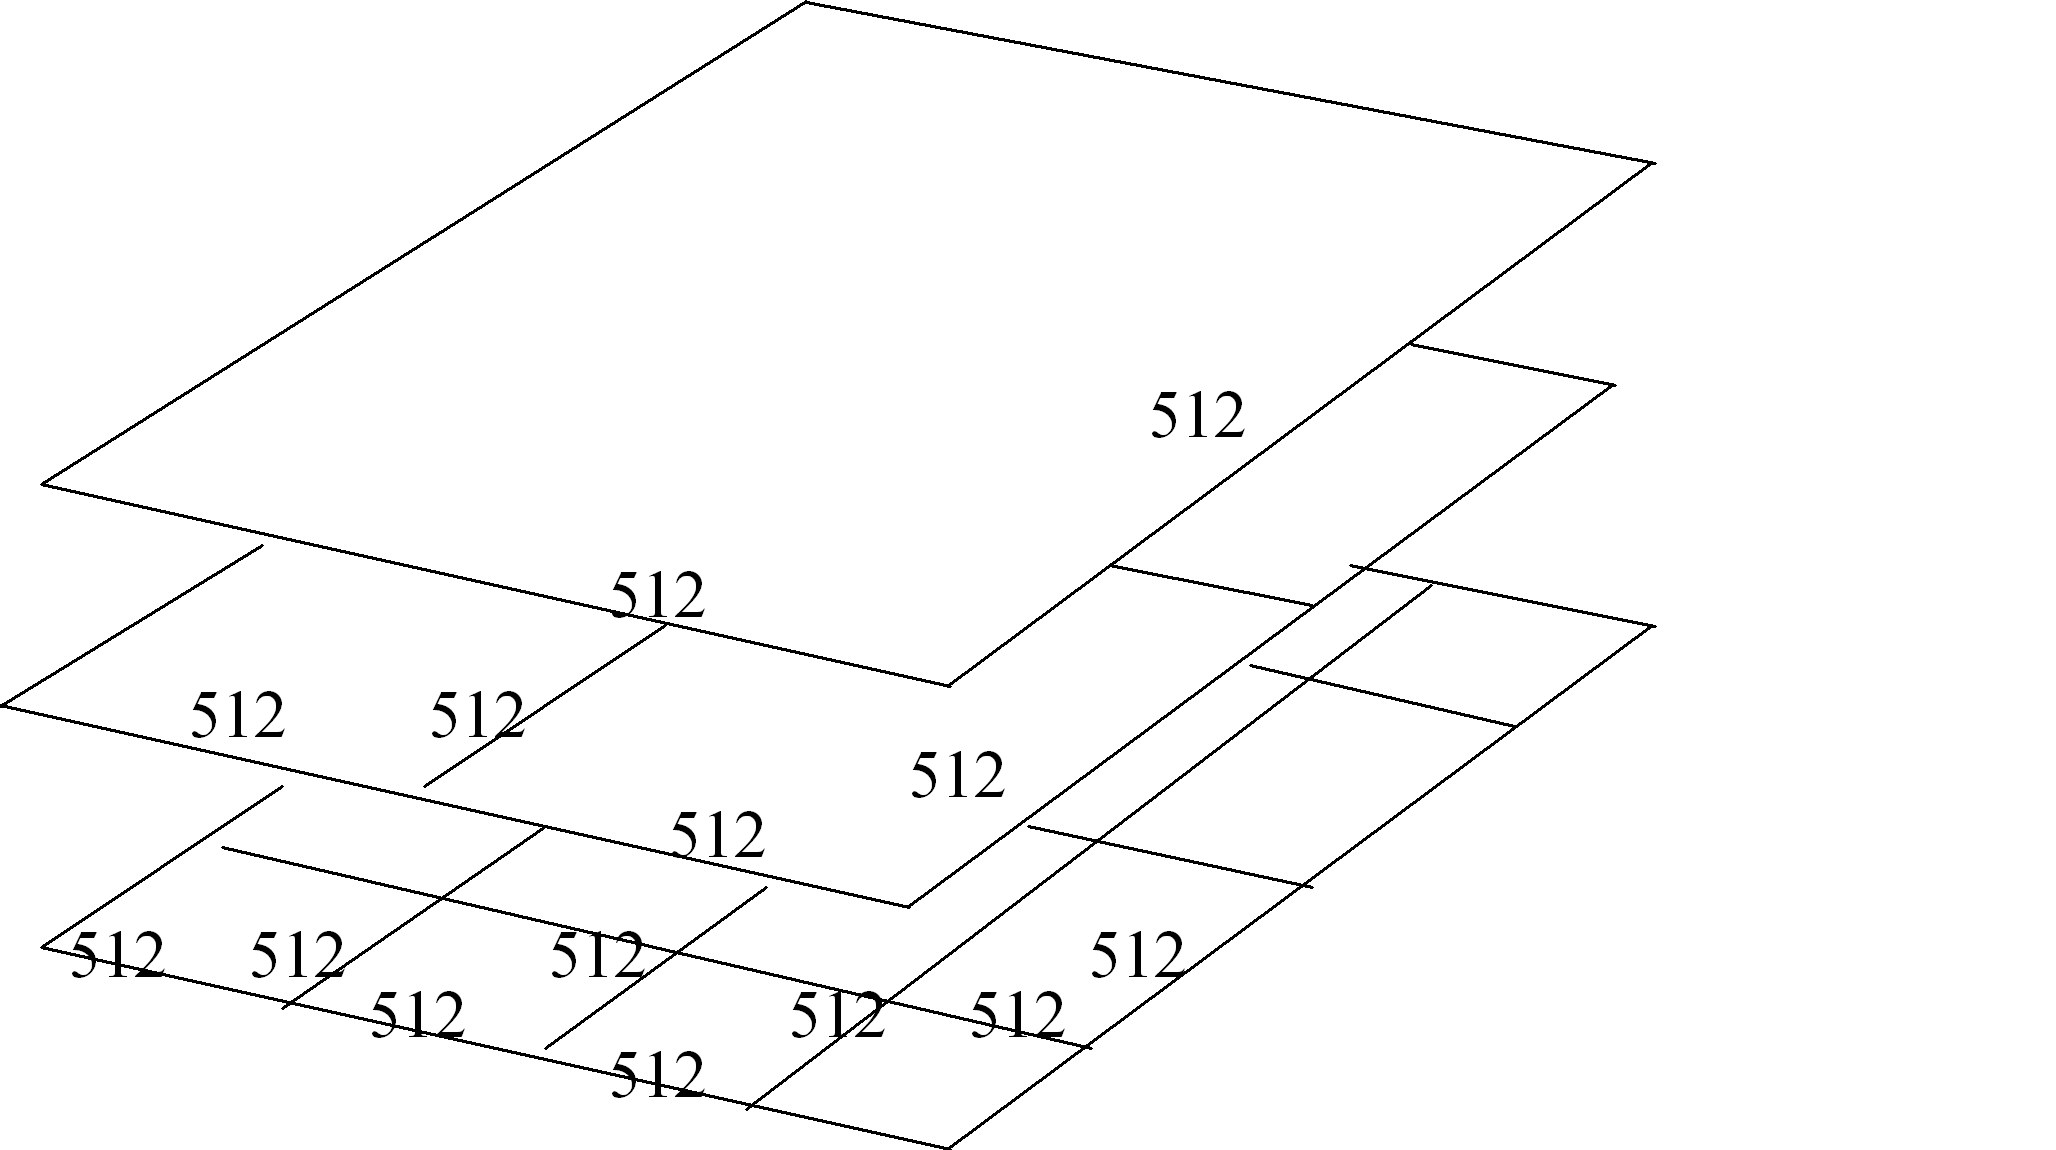
By the time you get down to the bottom most layer the raster will have exactly the same resolution as the original image, however only the tiles needed for the current view will be loaded into memory. The size of each tile may be configured via the Processing Options panel, as 'Raster and Terrain Pyramid Nugget Size'.
Various methods of interpolation are available to maximise the quality of the downsampled images. The default is ‘Bilinear’ for highest quality output, although ‘Averaging’ or ‘None’ may be used to reduce processing time.
Combine each pyramid into a single file
This option allows all of the pyramid tiles to be held within a single file. This saves disk space and allows Windows Explorer to navigate the directory easier. This option should not be used if the pyramid is to be deployed remotely via the Enterprise SDK. This limitation is because the Internet protocols used will not allow a portion of a file to be loaded.
Colour Raster Format
This is the format used for the storage of Colour Raster images. Note that under X11, only 8 bit and 24 bit images are currently supported in any of the formats.
Compression Factor
Using JPEG, JPEG 2000 and PNG, it is possible to define the compression factor – the higher the number the more compression is used at the expense of image quality. The Compression Factor value ranges for each file format are as follows:-
JPEG : 0, 2 – 255. (0 is lossless. Note, 1 is not a valid value.)
JPEG 2000: 0 – 255
PNG : 0 – 9
Raster Resizing
Reduce raster size
To reduce memory usage you may wish to limit the resolution of the raster data that you are loading. Reducing the number of pixels in the width and height aids you in doing this. You cannot reduce the raster size and apply downsampling to the same image
Raster Projection
Interpolate
When projecting raster images as part of a complete map you may wish to interpolate the image so as to optimise the quality of the image displayed.
This option causes the output image to be sampled from the input image in a smoother manner when it is projected. This can remove unwanted artefacts in low-resolution data, at the expense of some blurring. It typically gives higher quality output, although may be at the cost of higher memory and processor usage during processing.
Maintain palette when projecting palettised images
This option when enabled uses the original palette from the image for the output image.
This option may increase processing time due to the need to match colours.
Details: When a raster is projected rasters are converted to 24bit and then projected. The process of projection introduces additional colours due to the filtering of the data to obtain the new pixels in the output image. This option provides the ability to force the use of the original colours in the input image.
Disable dithering
This option disables dithering when projection raster images which are 8 or less bits in depth.
You should consider using ‘Maintain palette when projecting palettised images’ when using multiple input images which are likely to have the same set of colours (Arcs Charts, CADRG/CIB, ASRP etc…).
Details: Dithering of an image occurs when the number of colours in an image exceeds the number that can be stored in a particular bit depth. This option disables dithering so only the common colours are used and a closest match occurs.
Dithering attempts to approximate a colour by adding additional changes into the image in an attempt to fool the eye into thinking a colour exists. This is not particularly helpful if you view an image close up (zoomed in a lot) as you will see the effect
Because the most common colours are used when dithering is disabled a different palette may be generated from the original input image thus changing the shades of colours slightly.
Input Transparency
This option allows you to mask out areas of your output image.
If ‘None’ is selected then no mask is applied. This is the default setting.
If ‘Black areas around image’ is selected then these areas will be rendered as transparent.
If ‘All black pixels’ is selected then any black areas in the output image will be rendered as transparent.
If ‘From file’ is selected, then the file selected in the dialogue box is used as a mask. All the black areas in the mask will be rendered as transparent in the output image, while the rest will remain unchanged.
Note: If the data set contains mask information then this will normally take precedence over these options.
Raster Colours
Colour Depth
This option allows you to control the number of bits used to store the image when it is output from MapLink Pro Studio. Current options are Blank, 24-bit or 8-bit. If this option is left blank, then the depth of the source data is used unchanged. If 8-bit is chosen, then the number of colours used may optionally be controlled using the following options
Limit Number of Colours
If checked, this option will reduce the number of colours used in the output image to use the specified number. This is useful on system with limited number of colours available on the target platform – typically 8-bit palette based X11 systems.
Raster and terrain pyramid nugget size
This option determines the dimensions of the raster pyramid tiles in pixels, that the raster is divided up into.
The drop down list contains several predefined sizes. By typing in the same list a custom size can also be entered. This should be in the form: 'NxN' where N is the number of pixels, for example '768x768'.
Maximum pyramid depth
If the check box is ticked this allows a maximum number of layers to be entered for the raster pyramid, up to 15. If the check box is not ticked the number of layers in the raster pyramid will be unlimited.
Tiling only
To use a single tile for the raster and not pyramid it at all, select this option. In effect this is the same as setting the maximum pyramid depth to one.
Copyright © 1998 to by Envitia Group PLC.